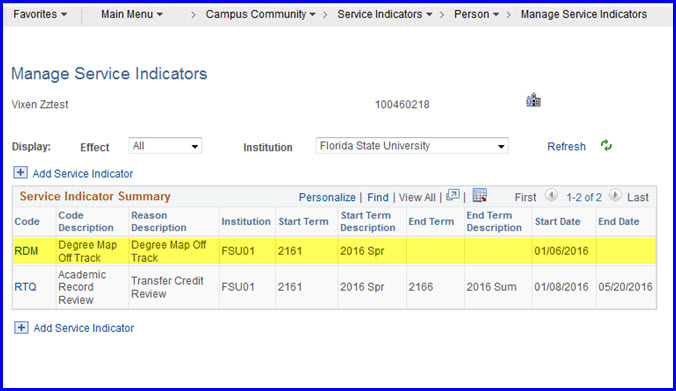
A Service Indicator is the equivalent of a hold. Holds can be placed on a student's record by a variety of university offices, for example, the Office of the University Registrar, Student Financial Services, or various academic deans' offices. The following examples demonstrate releasing a service indicator through the Student Services Ctr (Student) interface and adding a service indicator through the Manage Service Indicators interface.
Navigation
Main Menu>Campus Community>Service Indicators>Person>Manage Service Indicators
or
Main Menu>Campus Community>Student Services Ctr (Student)
or
Main Menu>Self Service>Advisor Center
Releasing a Service Indicator
1. Upon navigating to the Student Services Ctr (Student) page, a Search interface appears. Search for the student by last and/or first name or EmplID. The student's Student Center page appears.
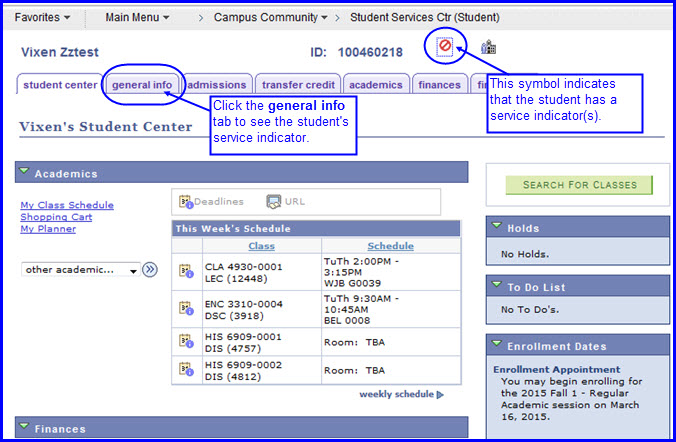
2. Click the general info tab to see service indicators. The page with service indicator information appears.
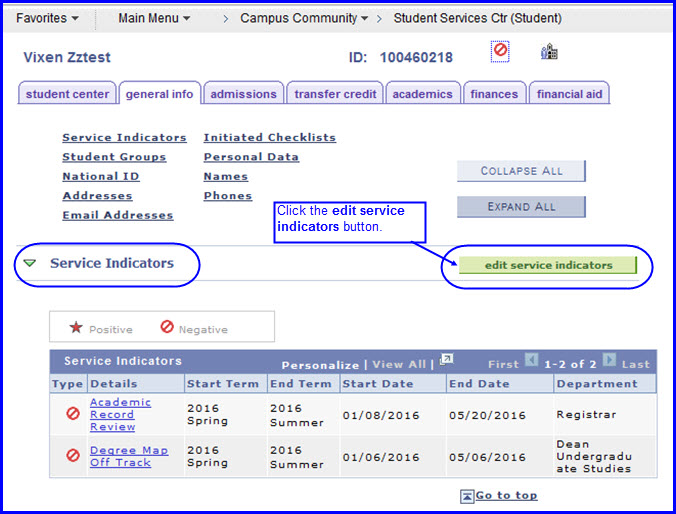
3. Click the edit service indicators button. The Manage Service Indicators page appears.
NOTE: Alternately, to go directly to a specific service indicator, click the indicator link. For example, in the image above, you could click Degree Map Off Track.
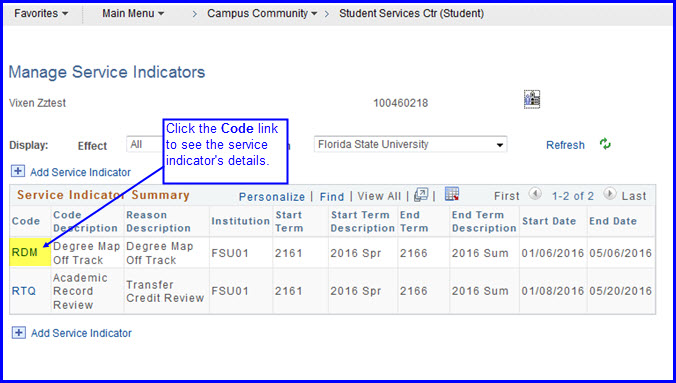
4. Click the link to the service indicator for which you want to view details. The Edit Service Indicator page appears.
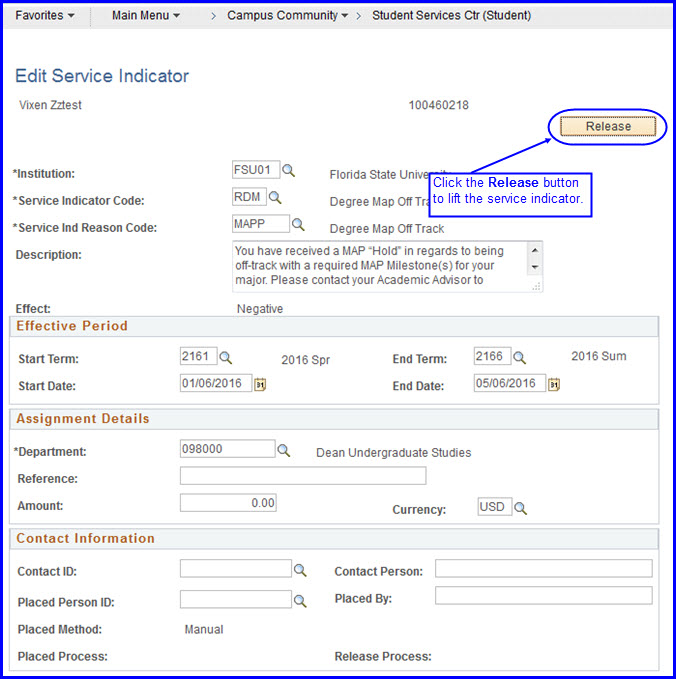
5. Click the Release button after confirming the indicator should be lifted. A confirmation box appears.

6. Click OK. The Manage Service Indicators page reappears, minus the indicator just released.
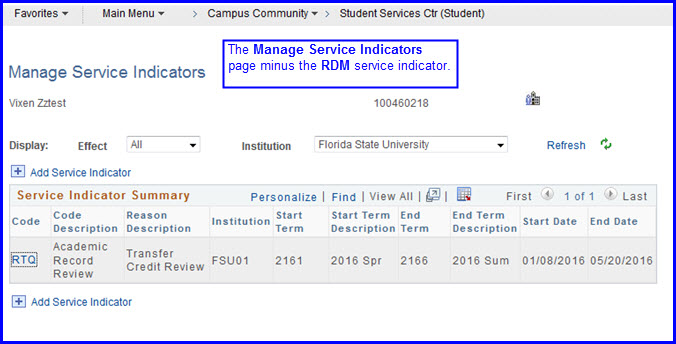
Adding a Service Indicator
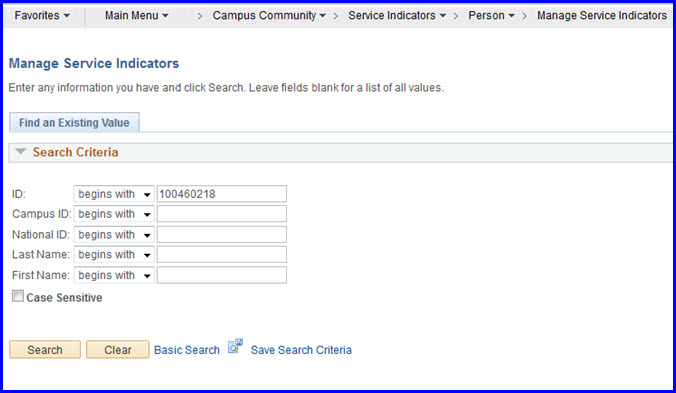
1. Navigate to Main Menu>Campus Community>Service Indicators>Person>Manage Service Indicators and search for the student.
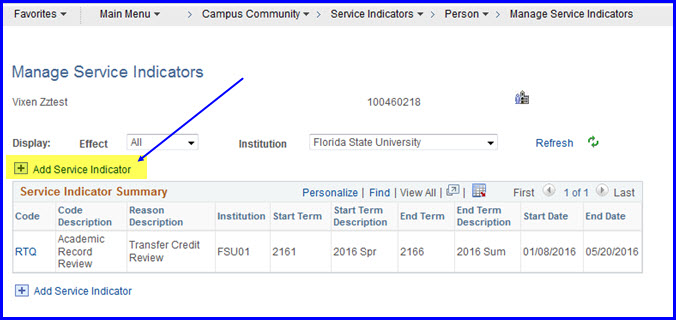
2. The Manage Service Indicators page appears. To add a new Service Indicator, click the Add Service Indicator link.
3. The Add Service Indicator page appears. Use the Look Ups to find the Service Indicator Code and Service Ind Reason Code values. Provide values for the Start/End Term/Date fields if necessary.
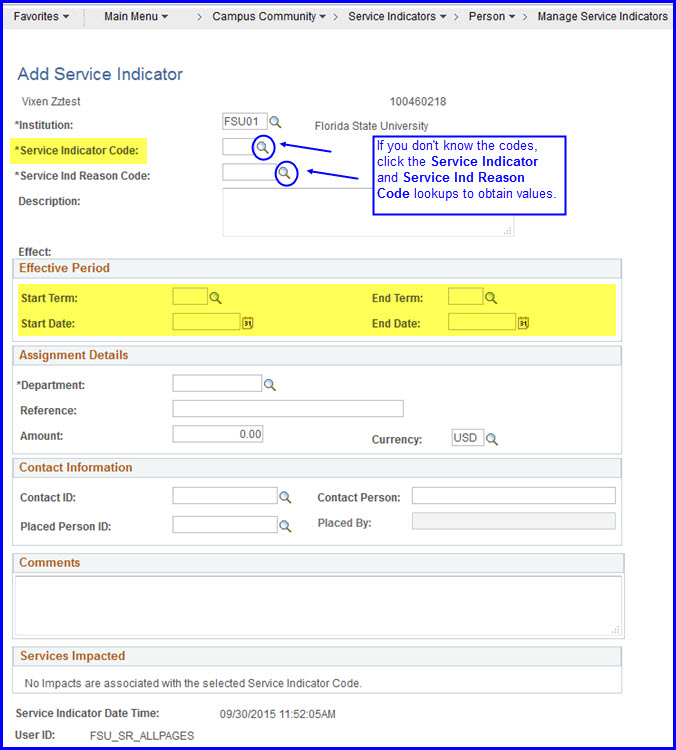
NOTE: Each indicator requires an effective action period.
- The Start Date value takes precedence over the Start Term date. If a start term date does not coincide with the day the term starts, the system "honors" the date. For example, if the date is set to September 15, and the term is set to Fall 2017, the system begins the indicator action on September 15th, not on the day the fall term begins.
- Where the Start Term value = 0000, the term-based impacts are in effect for all terms.
- Where the Start Term value = 9999, the term-based impacts will never take effect.
- If no end term is entered, the term-based impacts are effective until the indicator is released.
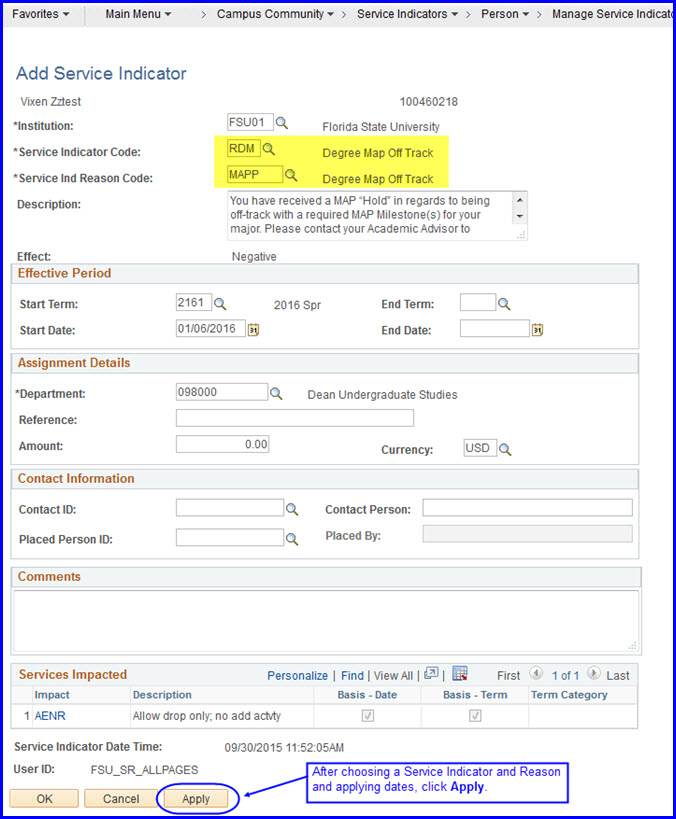
4. Click Apply, then click OK. The Manage Service Indicators page reappears, displaying the newly added indicator.
