Navigation: Log on to Student Central. Go to Main Menu>Records and Enrollment>Enroll Students>Quick Enroll a Student
1. In Quick Enroll a Student, ensure the Add a New Value tab is active.

2. Supply values for ID, Academic Career, and Term.
3. Click Add. The Quick Enrollment page appears.
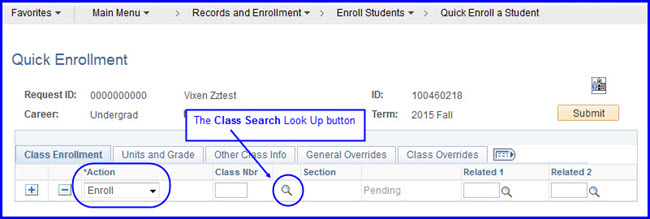
4. Ensure the value in the Action drop down box is Enroll.

5. Click the Class Search Look Up (first magnifying glass) or enter the class number in the Class Nbr field.
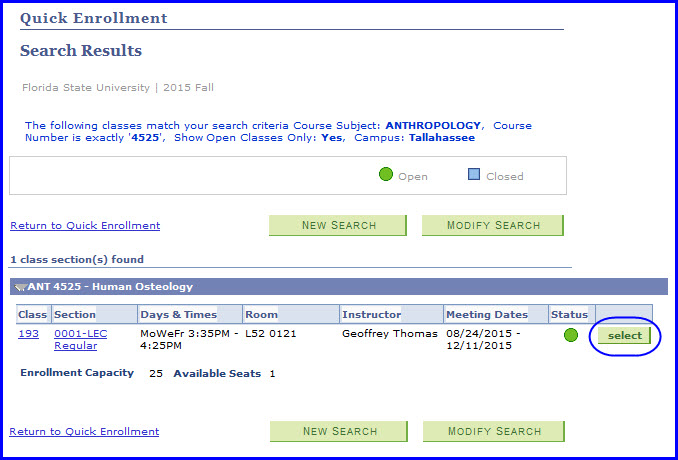
6. When the Enter Search Criteria page appears, enter the course subject and number.

7. Click Search.
8. Click the select button adjacent to the correct section number. You are returned to the Quick Enrollment page.

9. To add another class, click the Plus (+) button and follow steps #6 through #9.

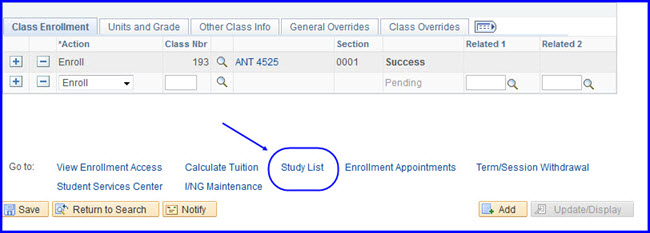
10. Click Submit after adding all necessary class sections.
NOTE: Prior to clicking Submit, the action status reflects Pending. Always check the status after clicking Submit. If the value is Message, click the link to see if other tasks are required. The message might be alerting you to the fact that the class is a requirement designation. Alternately, if the class is a variable hour class, you might need to alter the number of hours for which the student is taking the class.
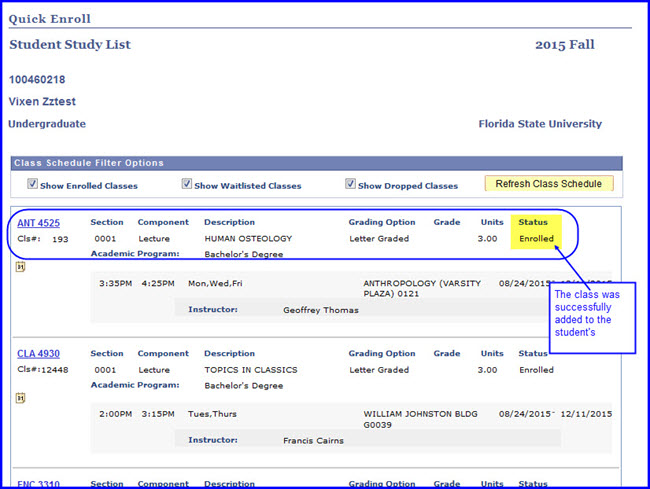
11. Click the Study List link to check your work. Click Cancel to return to the Quick Enrollment page.


12. Click Save.
