This topic discusses how to create a run control that mass releases a service indicator.
- Think of the run control as a job. By following the instructions below, you're choosing parameters (also know as controls) that tell the job what service indicator to release for whom.
- In this example, the job process releases a service indicator for the students contained in an external CSV (*.csv) file you'll create and upload to the job.
- When you add a new run control ID (which is simply a descriptive name of your choosing for the run control) and save it, you can use the run control again by locating it through the Find and Exiting Value tab.
- Note, however, that if you re-use the run control, you must either:
- change a parameter, such as the service indicator code, before running the job on the same .csv file, or
- if you don't change any of the parameters, upload a new .csv file (because if you don't you'll reapply the same service indicator to the students in the original .csv file).
Navigation
Main Menu>Campus Community>Service Indicators>Person>Mass Release
Creating the CSV File
The external file of student names, which is most likely an Excel file, must be saved as a comma delimited (*.cvs) file.
NOTE: Instead of pasting the EMPL IDs into a new Excel file, you can perform a Save As> (Comma delimited) (*.csv) on the existing Excel file. However, you must ensure that there are no column headers, that the EMPL IDs are text formatted, and that there are no extra sheets in the Excel workbook as described below.
1. Open the Excel file. Copy the values in the EMPL ID column (or select a range of students and copy).
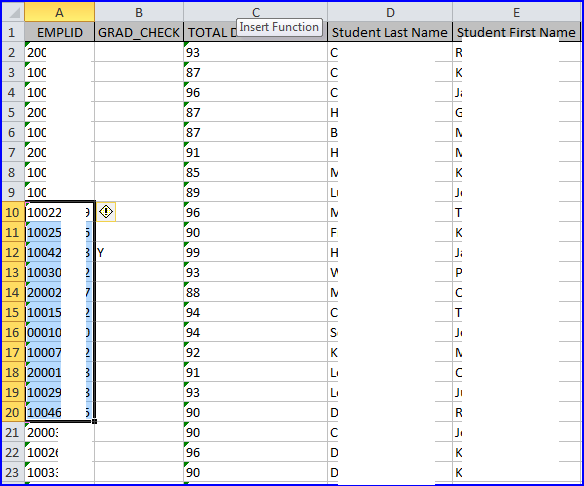
2. Open a new Excel file and paste the values into the first column.
IMPORTANT! This new file cannot include column headers. Paste only the EMPL IDs into the new Excel file.
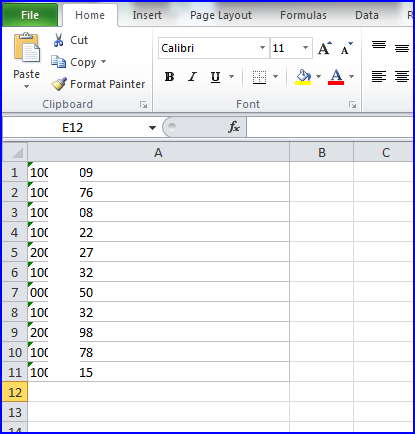
3. Highlight the cells and right-click. Select Format Cells>Number tab.
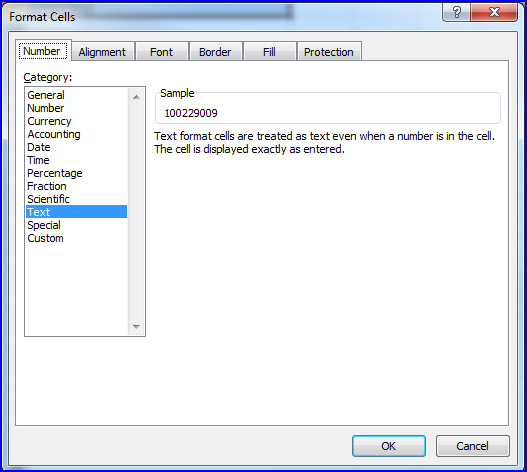
4. Select Text and click OK.
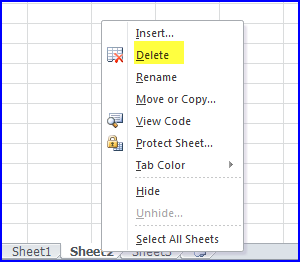
CAUTION! Check the bottom of the Excel workbook. If more than one worksheet is present, the file will not save as a CSV file. You must delete the extra worksheet/s by clicking the worksheet tab to activate it, and then right-clicking and selecting Delete. Repeat for all extra worksheets.
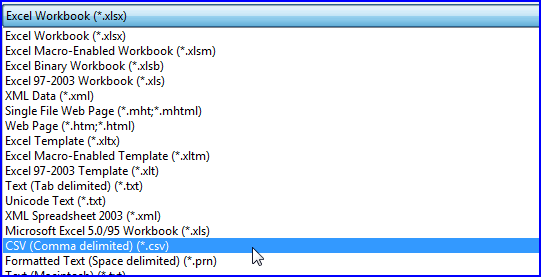
5. Go to File>Save As, name the file, and from the Save as type drop down box, select CSV (Comma delimited)(*.cvs).
6. Click Save. This is the file you'll upload when you mass assign the service indicator below.
Mass Releasing a Service Indicator
1. After navigating to the Mass Release page, click the Add a New Value tab.
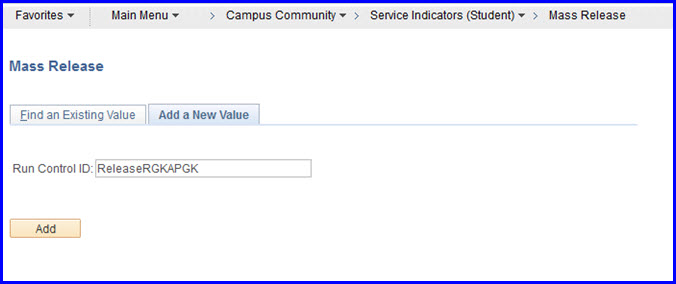
2. In the Run Control ID field, type a name and click Add. The Mass Release page appears.
IMPORTANT! The Run Control ID field does not allow spaces.
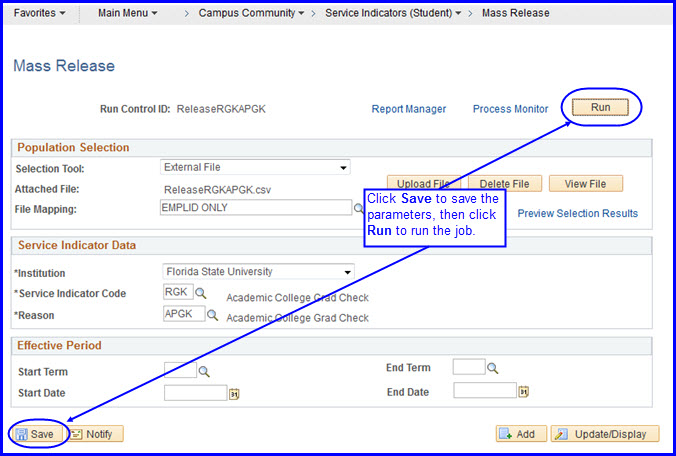
On the Mass Release page, you'll enter the parameters for the run control (job). Observe that the Run Control ID reflects the the name you added.
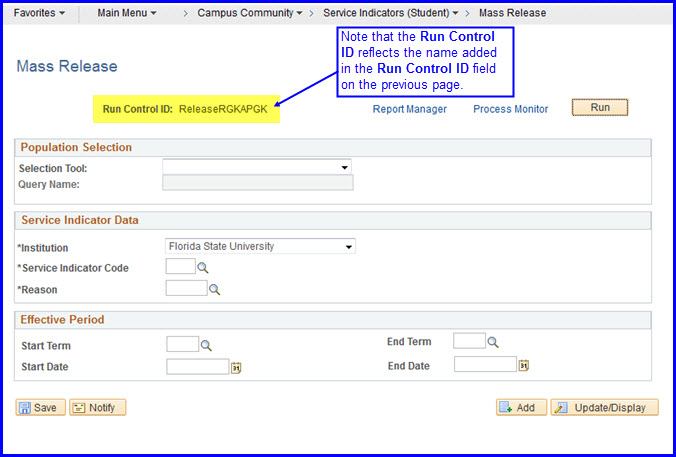
3. In the Selection Tool drop-down box, choose External File because you're going to upload the external .csv file you created earlier, and then click the Upload File button. The File Attachment dialog box appears.

4. Click Browse, then navigate to and select the .csv file. It appears in the File Attachment dialog box.
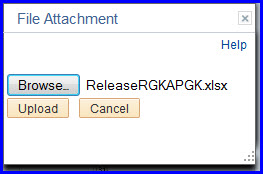
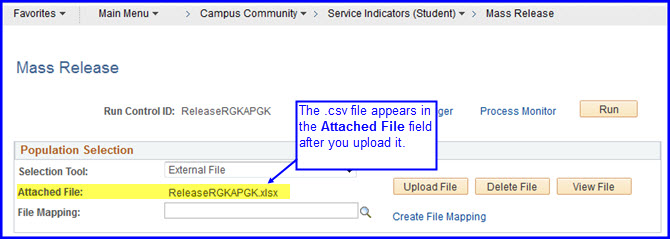
5. Click Upload. The file is uploaded and appears in the Attached File field.
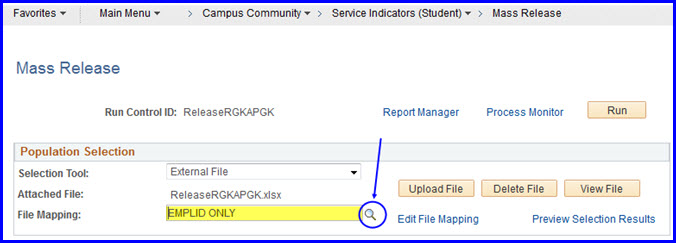
6. Click the File Mapping Look Up button and select EMPLID ONLY.
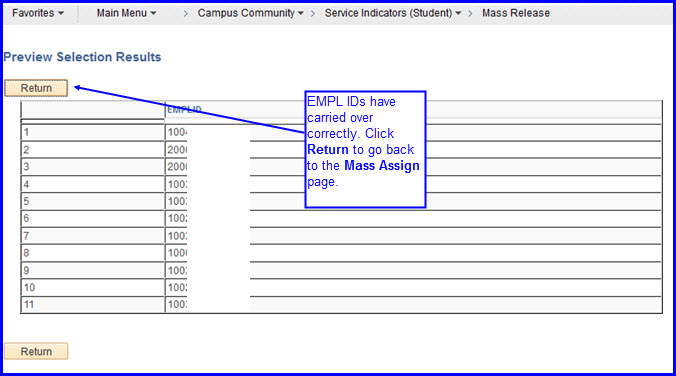
7. Click the Preview Selection Results link to see that the file has uploaded in the data in the way you intended.
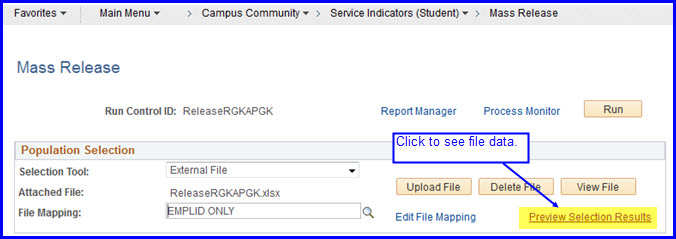
8. The Preview Selection Results page appears. Confirm the file data appears as it should, and click Return to go back to the Mass Assign page.
9. In the Service Indicator Data box, click the Service Indicator Code Look Up and Reason Look Up to select from a list of values.

10. When releasing a service indicator, do NOT provide values for any fields in the Effective Period box. Running the job with null values here means the release happens immediately.
IMPORTANT! The only exception to this rule occurs when you have the same service indicator appearing across multiple terms. For example, some health service indicators appear on a student's record for Spring, Summer, and Fall terms. To release a single indicator, in this case you would need to provide an End Term value.

11. Click Save to save the parameters for the run control, and then click Run to run it.
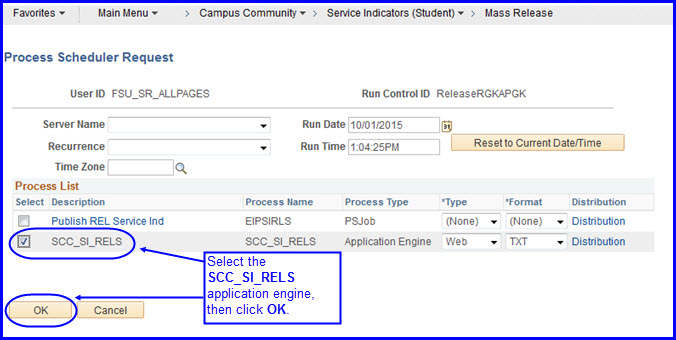
12. The Process Scheduler Request page appears. In the Process List area, select the SCC_SI_ASSN check box and click OK.
13. The Mass Release page reappears. Click the Process Monitor link.

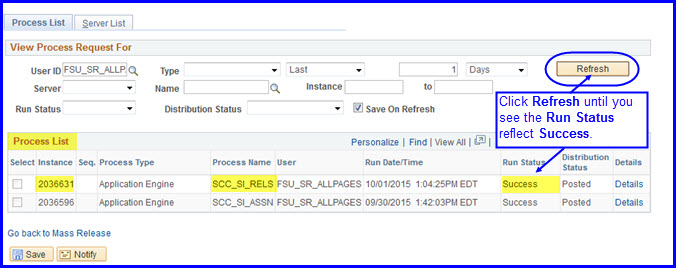
14. The Process List reappears. Check the Run Status column. If the status still reflects Initiated or Queued, click the Refresh button. Do so until the Run Status displays Success.
15. To ensure that the job processed, click the Details link. The Process Detail page appears. Make a note of the instance number.
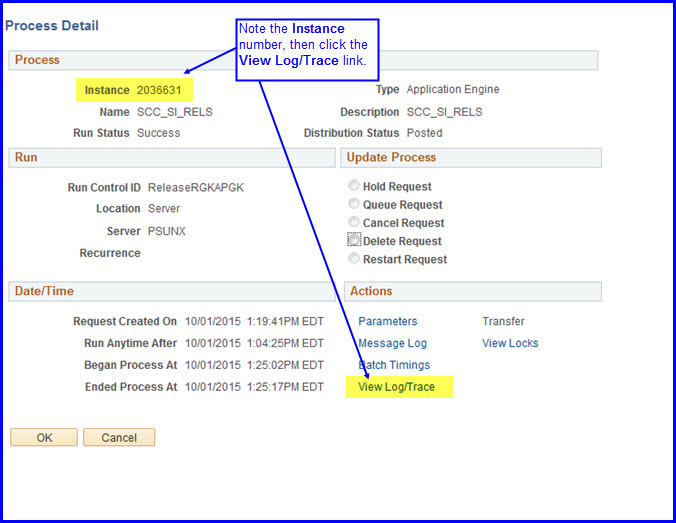
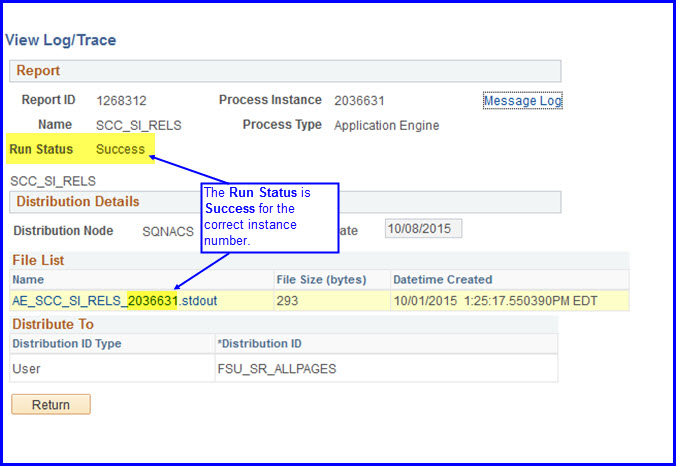
16. Click View Log/Trace. The View Log/Trace page appears. In the File List box, note that the instance is recorded as having been processed.
