The Grade Roster Archive Dashboard allows you to track the progress of grade submissions by college, academic organization, course number, and approval status, among other parameters. Using this dashboard, you can also see grade distribution statistics.
- You must have one of the roles listed below to access this report.
- If you have taken Curriculum Management Basics/Advanced or Student Records 201 and followed up on obtaining your security roles, you will already have one of the roles listed below.
- If you haven't taken one of these courses and you need to access this dashboard, request FSU_SR_GRADE_VIEW.
| FSU_SR_CLASS_SCHED_SUPER |
| FSU_SR_DEPT_SCHEDULER |
| FSU_SR_ENROLLMENT_STAFF_USERS |
| FSU_SR_ENROLLMENT_SUPER_USER |
| FSU_SR_GRADE_SUPER_USER |
| FSU_SR_GRADE_ING |
| FSU_SR_GRADE_UPDATE |
IMPORTANT! myFSU BI is supported on the following browsers:
- Chrome: 12.x-29.x, but not on the latest version of Chrome-30.x
- Firefox: 17+, 10+, 6+, 3.5+
- Internet Explorer (IE): 7.x-10.x
Navigation
Go to my.fsu.edu>Faculty and Staff tab. Under myFSU Links, click the BI icon. On the BI main page, go to Dashboards>CS-Real Time Enrollment>Grade Roster Archive.
A Note on Term Syntax
| TERM SYNTAX | |||
| Millennium (+) | Year (+) | Term (=) | Term Code |
| 2 | 14 | 1 (spring); 6 (summer); 9 (fall) | 2141 or 2146 or 2149 |
To reiterate, the term syntax is: 2 for the millennium, plus 14 for the year, plus: 1 = Spring term; OR 6 = Summer term; OR 9 = Fall term.
Thus:
- 2141 = Spring term 2014;
- 2156 = Summer term 2015;
- 2159 = Fall term 2015, and so on.
Following the same logic, if we step back to the previous century the following are true:
- 1879 = Fall term 1987 (1 for the millennium, 87 for the year, and 9 for fall);
- 1986 = Summer term 1998 (1 for the millennium, 98 for the year, and 6 for summer);
- 1641 = Spring term 1964, (1 for the millennium, 64 for the year, and 1 for Spring), and so on.
Steps
1. After navigating to the dashboard, provide values for the prompts and click Apply. In the example below, the following values are selected:
- Term = Fall 2013
- College = Visual Arts, Theatre, & Dance
- Academic Org = Art History
- Session = (defaults to) Regular
- Campus = Main
- Full Course Nbr = ARH4884
2. The dashboard returns the report, which allows you to select a summary or detailed view of each class.
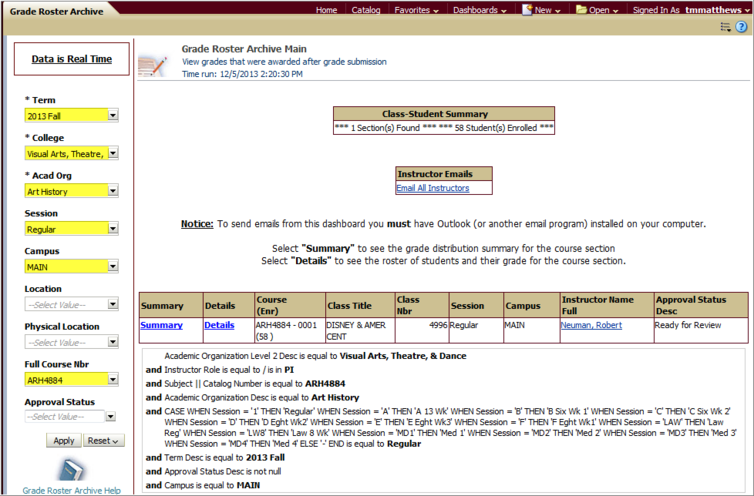
3. Click the Summary link. A Roster Summary Information button appears; click it. The Grade Roster Archive Summary appears.

4. In this example, the Summary link was clicked. The Summary view provides information regarding:
- the number of students who have been graded and not graded;
- the Class GPA and equivalent percentage value,
- The Approval Status, and
- A line graph that provides a visual representation of grade distribution.
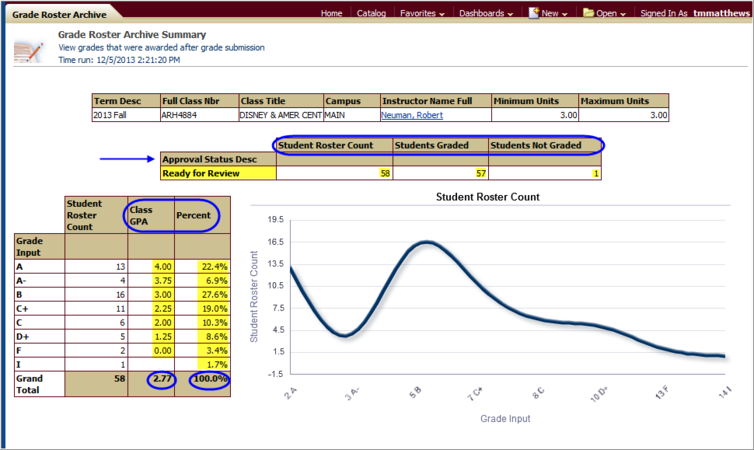
5. Click the Return link at the bottom of the page to return to the main Grade Roster Archive page.
6. Click the Details link. A Roster Detail Information button appears; click it. The Grade Roster Archive Detail appears.

7. The Detail view provides information regarding:
- every student's grade, and
- for those students who received an F, U, or I, the default grade, extension term and year, and last attended date as appropriate.
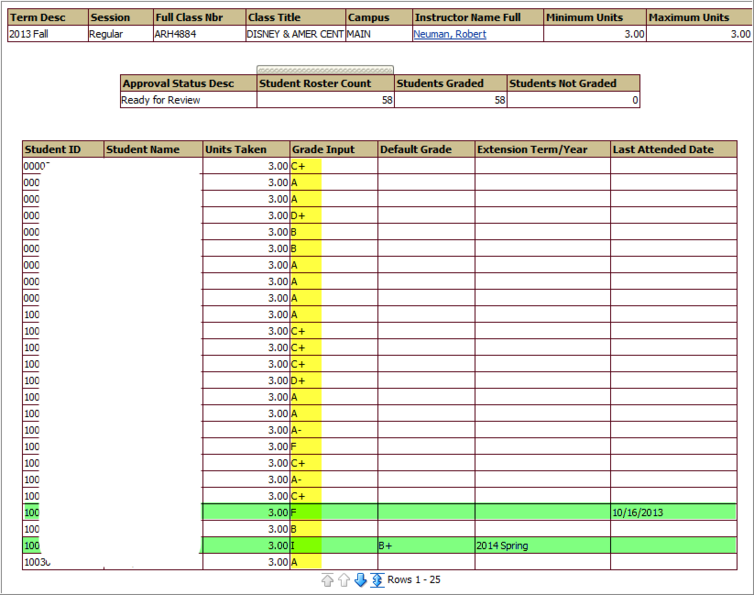
8. Click the Return link at the bottom of the page to return to the main Grade Roster Archive page.
To Email All Instructors
1. To email all instructors, click the Email All Instructors link. (To email any individual instructor, click that instructor's name.)
![]()
2. Upon clicking, an email message window appears.
- If you selected one instructor, that instructor's email address populates the To field.
- If you selected Email All Instructors, those email addresses populate the To field
- In both instances you are cc'd, as your address also populates in the To field.
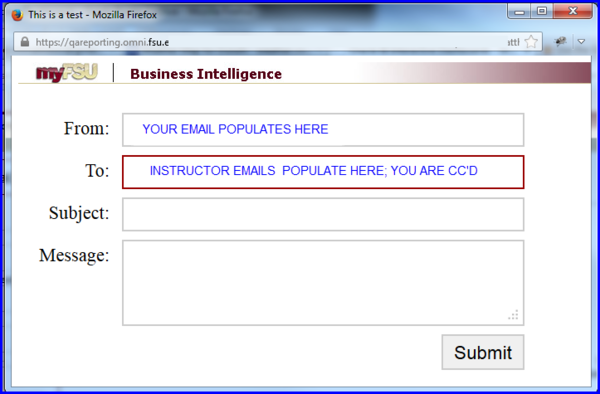
3. Provide a Subject and Message text, and click Submit to send.
To Print
1. From the bottom of the main Grade Roster Archive report, the Summary Report view, and the Detail report view, Print and Export links are available.
2. Click Print to see print options:

3. Select Printable PDF to obtain a PDF version. Ensure that in the browser's settings pop-ups have been allowed. For more information on browser settings, see the Allowing Pop-Ups section of the Browser Settings-Tips & Tricks page.
To Export
1. Click Export to see export options.
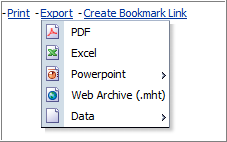
2. Select Excel to have results transferred to a spreadsheet. You might get the following message:
(The file you are trying to open, 'FILE NAME', is in a different format than specified by the file extension. Verify that the file is not corrupted and is from a trusted source before opening the file. Do you want to open the file now?)

3. Click Yes to have the content exported into Excel.
4. Alternately, you might want to simply save the file as a Web Archive and bookmark it. Click the Web Archive (.mht) link. You can then save it to your Bookmarks/Favorites.
