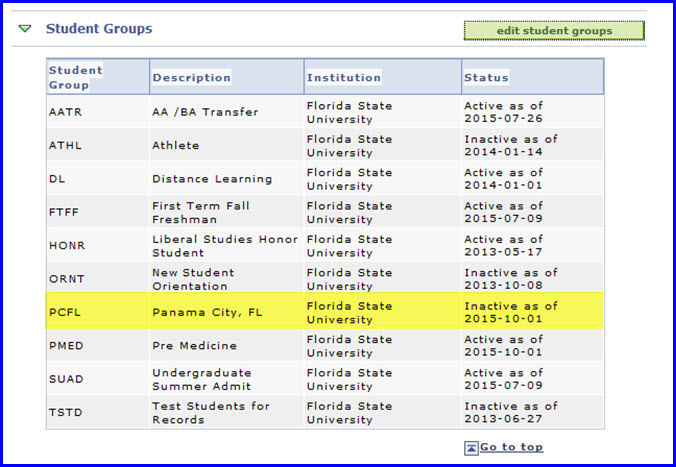
This topic explains how to activate or inactivate a student group for a student. In the example below, the premed student group is activated and then subsequently the PCFL student group is inactivated.
Navigation
Main Menu>Self Service> Advisor Center> My Advisees
OR
Main Menu>Campus Community>Student Services Ctr (Student)
Steps
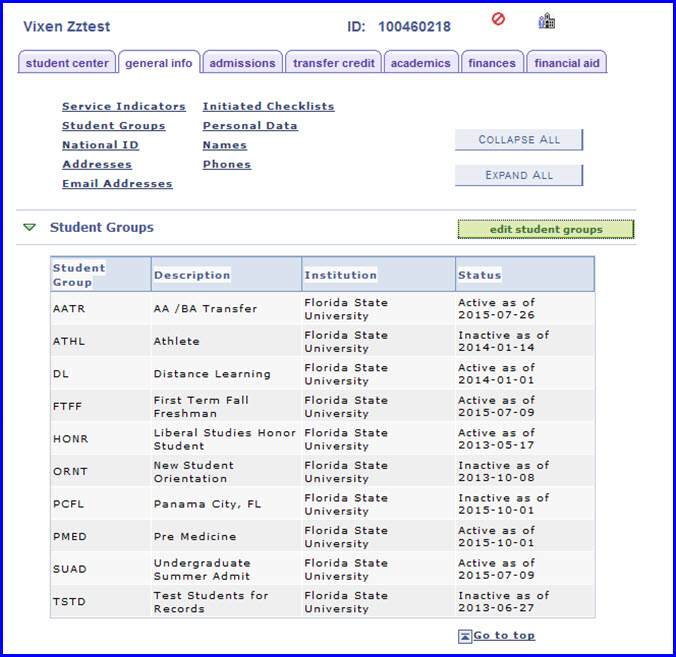
1. After locating the student for whom you want to activate a student group, under the Advisor Center tab or Student Services Ctr (Student), click the general info sub-tab.
2. In the Student Groups area, click the edit student groups button.
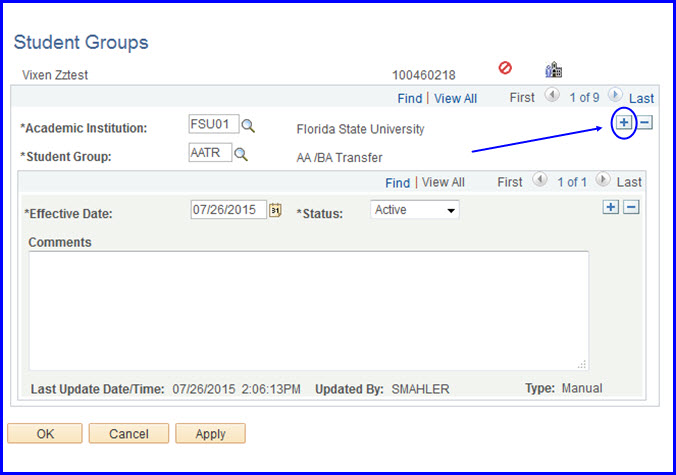
3. The Student Groups page appears. Click the Plus (+) button to add a new student group.
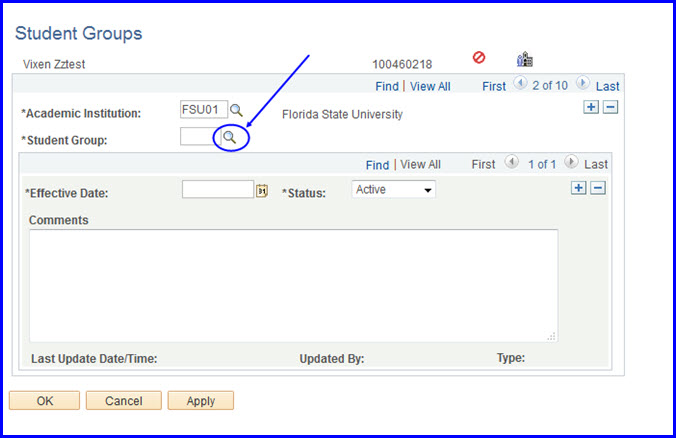
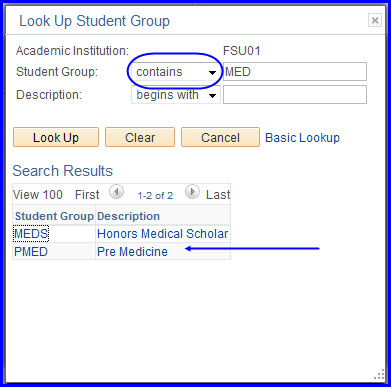
4. If you do not know the abbreviation for the new student group, click the Look Up button and the Look Up Student Group search appears.
NOTE 1: You can only add student groups for which you have row-level security access. Prelaw and Premed have been assigned to everyone who has Advisor Center security.
NOTE 2: In this example, we know the student group name contains MED; thus, the student group operator was set to contains and MED was typed in the field. The search returned both student groups that contain MED. The link for Pre Medicine was clicked.
5. The Student Group field is populated with the PMED value, and the status is Active.
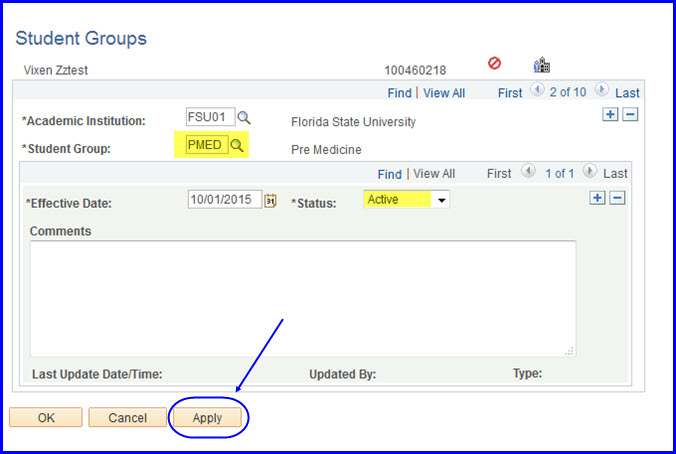
6. Click Apply and then OK, and you are returned to the general info tab. Note that under Student Groups, the new PMED Student Group is listed.
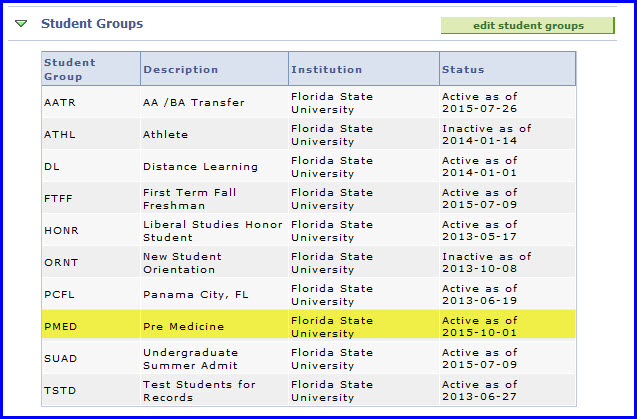
7. To inactivate a student group, click the edit student groups button to return to the Student Groups page. In the following example, the PCFL student group is inactivated.
8. Using the arrow buttons, click to the PCFL student group.
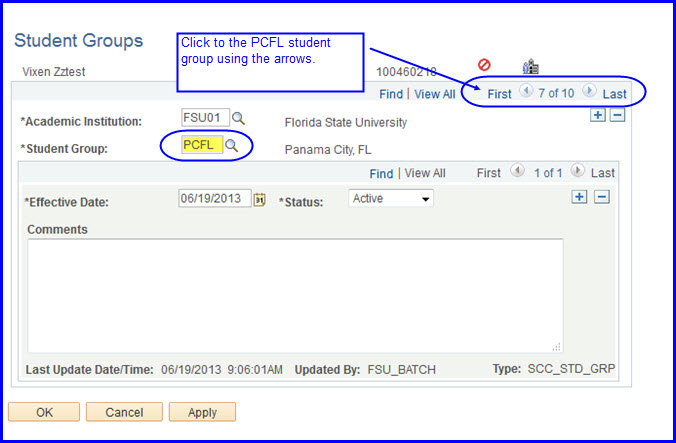
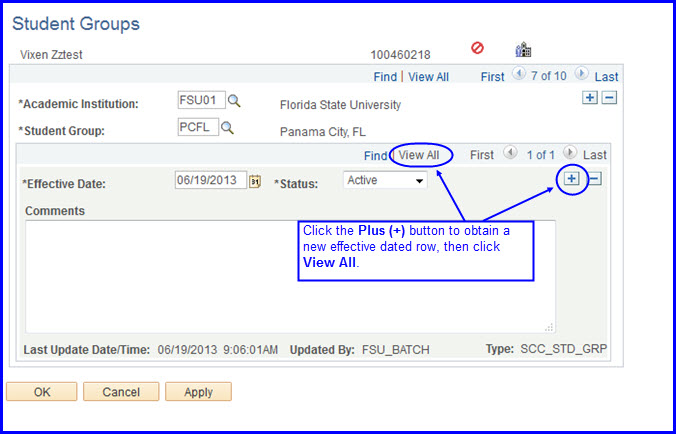
9. Under the second gray bar, click the Plus (+) button to obtain a new effective dated row, and then click View All.
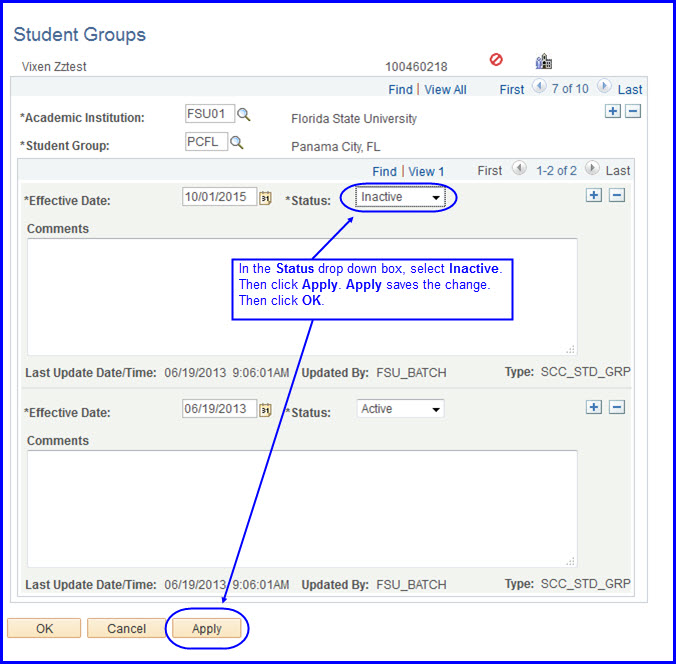
10. In the new effective dated row's Status drop down box, select Inactive. Then click Apply.
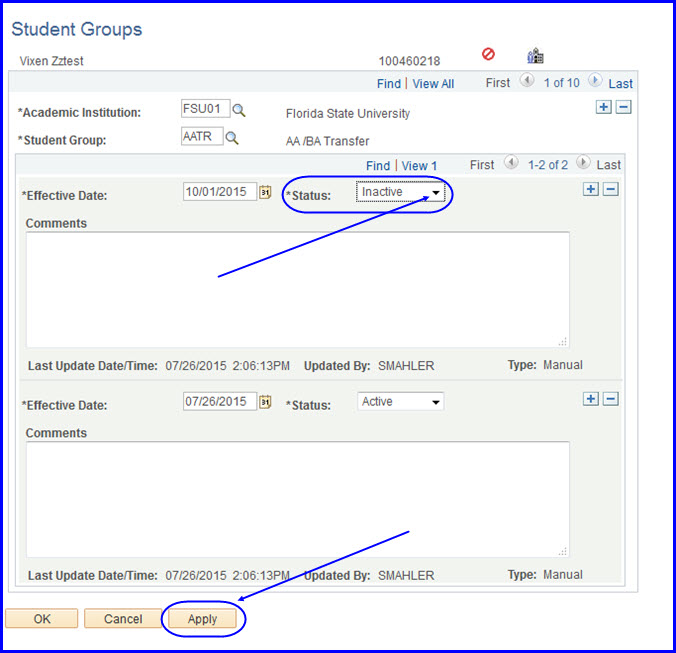
11. Click the Status drop down box, choose Inactive, then click Apply.
IMPORTANT! It is imperative that you alter the Status to Inactive rather than simply deleting the Student Group. Altering the status maintains a proper record of the student's student group affiliations.
12. Click OK. You are returned to the general info tab. Note that under Student Groups, the Panama City, FL (PCFL) student group reflects the Inactive status and the date the status went into effect.
