Regardless of whether your enrollment appointment is open, you can search for classes and add them to your shopping cart. This action does not save you a seat in those classes. This action simply allows you to save specific classes in the shopping cart until your enrollment appointment becomes active. Use the shopping cart so that you don't have to search again for classes after your enrollment appointment opens!
1. Go to my.fsu.edu and log on using your FSUID and password. (This is the same as your Canvas log on.) Your myFSU portal Student Home page appears.
2. On the Student Home page under the My Courses portlet, click the Future tab.
IMPORTANT! On the Future tab, you might see a drop-down box with term options. BE AWARE that selecting a term here does NOT carry through to the next step. You will need to select the term on the Shopping Cart-Select Term page.
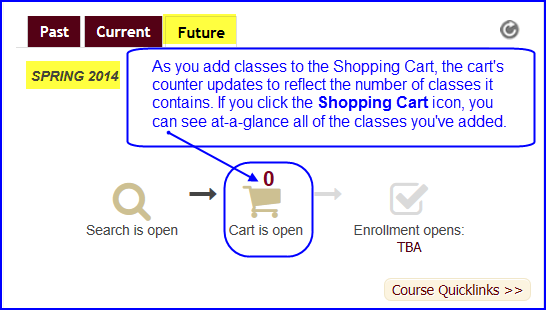
3. Click the Cart is open icon.
NOTE: If it is possible to search for classes for either summer or fall term, the Shopping Cart-Select Term page appears. Select the term in which you wish to enroll and click Continue.
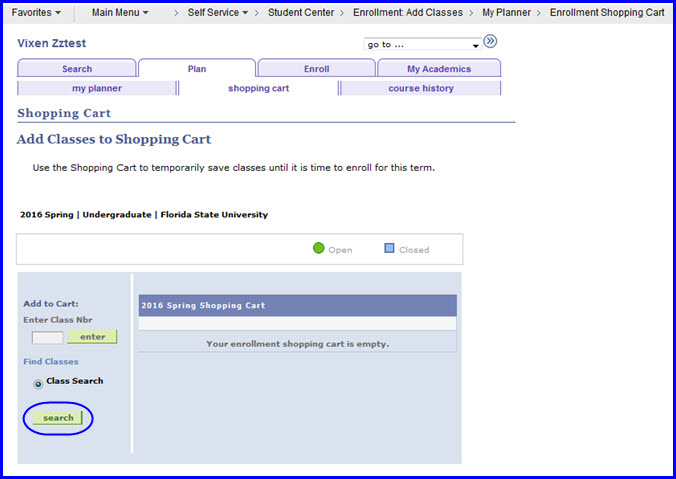
4. The Shopping Cart-Add Classes to Shopping Cart page appears. Again, ensure that you selected the correct term, and click search.
NOTE: If you click away from this tab, for instance-if you go to the Search tab, you must check and change the term as necessary!
5. The Shopping Cart-Enter Search Criteria page appears.
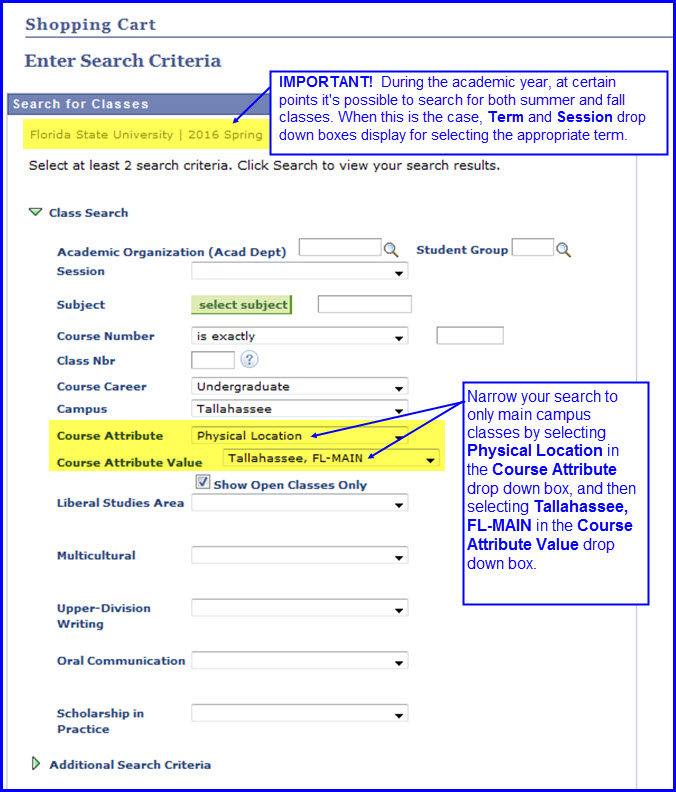
6. Narrow your search to the campus where you will be attending classes. In the Course Attribute drop down box, select Physical Location. In the Course Attribute Value drop down box select the campus, for example, Tallahassee, FL-MAIN for main campus.
IMPORTANT NOTE FOR STATE EMPLOYEES: First, select field values such as Academic Organization or Subject and Course Number. Then, from the Course Attribute drop-down box select Course Funding Category. Next, from the Course Attribute Value drop-down box select State Fundable.
It's important to select other field values in conjunction with Course Attribute and Course Attribute Value. Choosing values for only those two fields causes the system to hang-too many results are available if the search is constrained by only those categories.

NOTE: The Campus value defaults to Tallahassee. If you change this value, it remains the same for the duration of your search. However, after you go to another interface in Student Central-for example, My Academics-the field value reverts to Tallahassee, and you must change it again to search for classes taught at another campus.
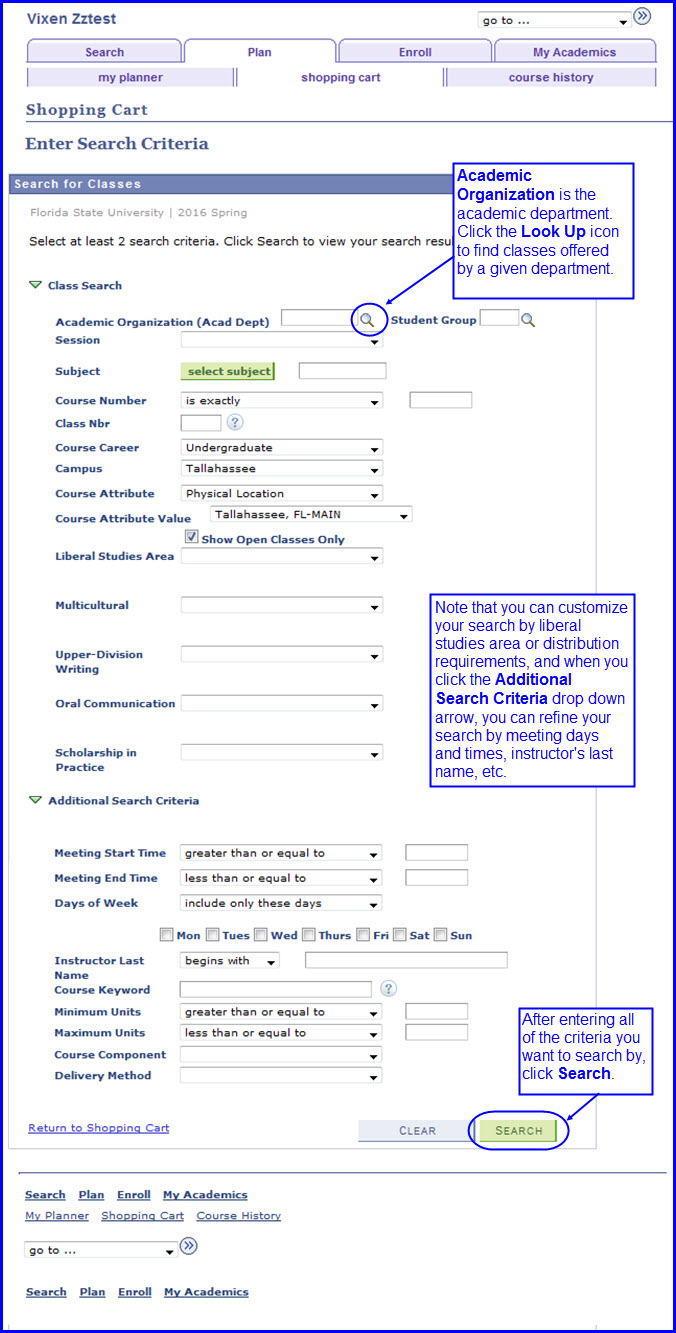
7. Enter relevant search parameters like the academic department. Expand the Additional Search Criteria section by click the down arrow, and you can further refine your search by meeting days and times or instructor. Click the Search button.
NOTE:
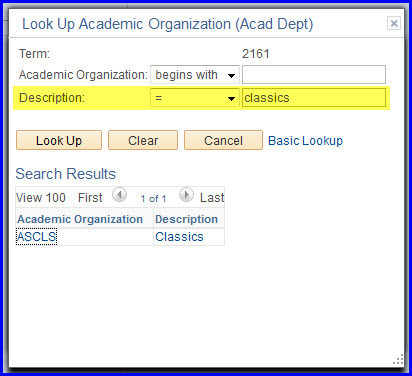
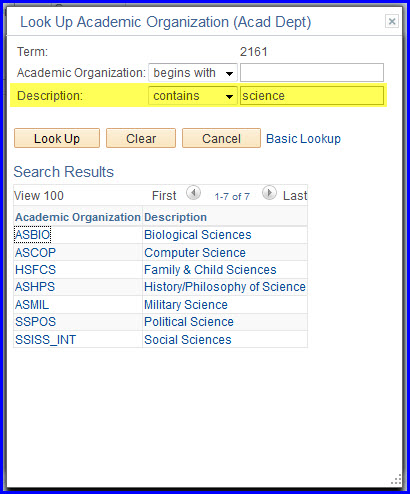
If you want to narrow the search by academic department, click the Academic Organization (Acad Dept) Look Up button. The Look Up Academic Organization (Acad Dept) dialog box appears.
- If you know the department's name, in the Description drop down box select the = (equal to) operator, and type the department name in the adjacent field. Then, click Look Up. Your search results appear.
- If you're unsure of the department's name, set the Description operator value to contains or begins with and type all or a portion of the department description. Then, click Look Up. Your search results appear.
- When you click the Academic Organization (Acad Dept) link, the organization's code appears in the Search for Classes-Enter Search Criteria page's Academic Organization (Acad Dept) field.
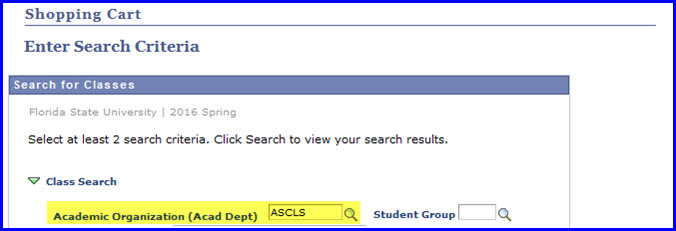
- CAUTION! If you search by academic organization, you must enter the academic organization code in the Academic Organization (Acad Dept) field. In this example, the code ASCLS is used. Be aware that you cannot type "classics" in place of entering the code. If you do not know the department code, use the Look Up interface as demonstrated above to select it.
8. Upon clicking Search, the Search Results page appears. Review the class details for the class you're interested in by clicking either the class link or section link. Always consult the class details to learn if a class is restricted to majors-only or to participants in a special program.

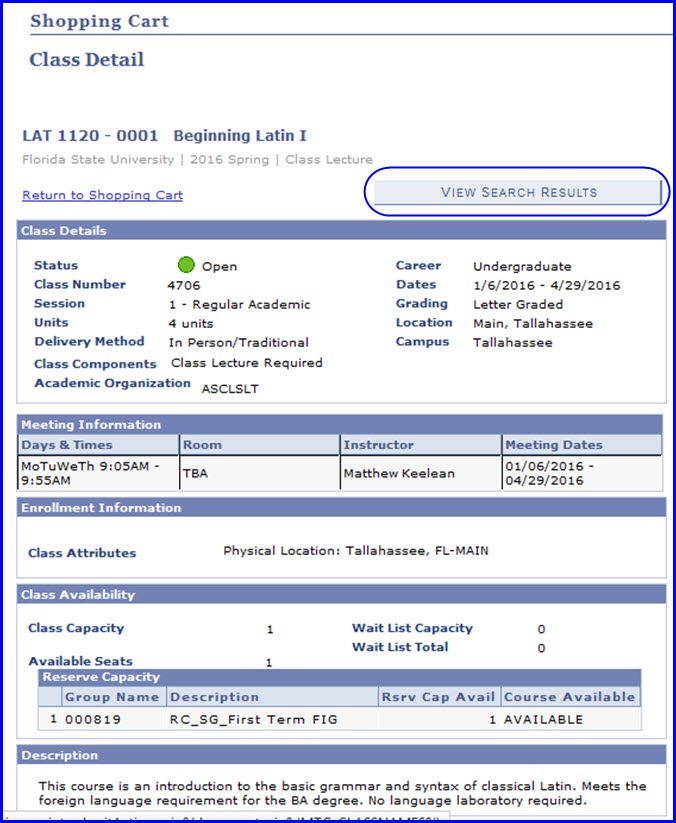
9. If you want to add the class to your cart, click the View Search Results button, which returns you to the Search Results page. Click the select button appearing next to the section you want to add.

10. Upon clicking select, The The Shopping Cart-Select Classes to Add - Enrollment Preferences page appears.
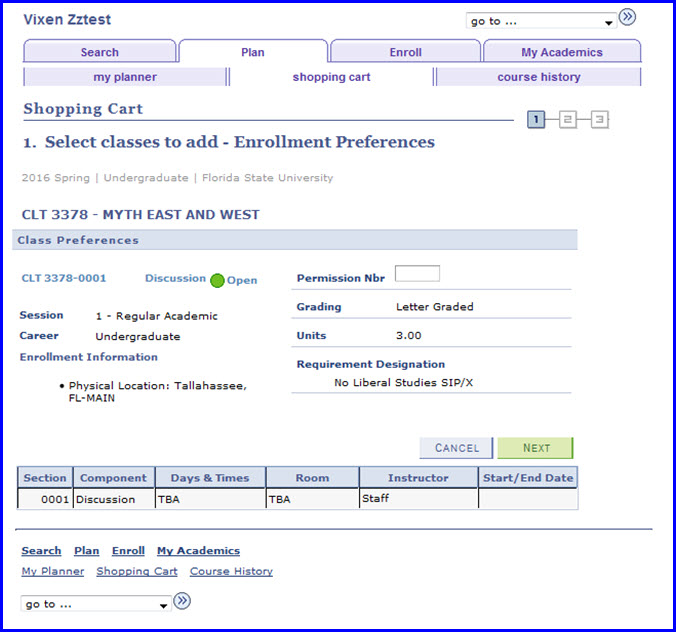
11. Further verify the information. Click Next. The Search Results page reappears, displaying a note stating (the class) has been added to your Shopping Cart.
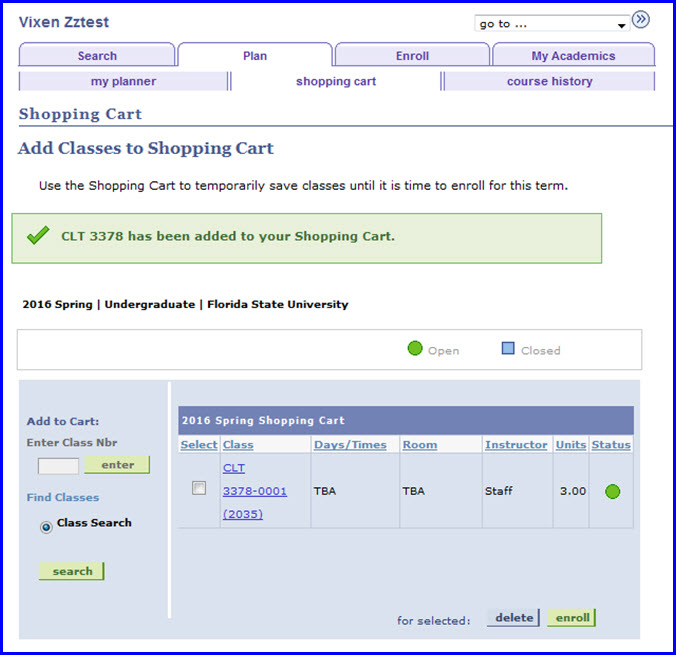
12. Click the search button to look for and add other classes to your shopping cart.
NOTE: As you add classes to your Shopping Cart, the cart's counter reflects how many classes it contains. Click the Shopping Cart icon to see at-a-glance the classes it contains.

WARNING! Remember that putting classes in your shopping cart does not save you a seat in the class. Additionally, saving a course to the shopping cart does not ensure that you meet the requirements for enrolling in that course. You must always check the Class Details page to ensure that you are eligible to enroll in a given class. Check with your advisor if you have questions.
