Follow the instructions below to pull your class roster into the Excel format.
Navigation
1. Log on by going to my.fsu.edu and signing in with your FSUID and password. Your portal page appears.
2. From the left-hand side of your portal page, choose Teaching>Faculty Center. Your My Schedule page appears.
Downloading the Class Roster
NOTE 1: Ensure that you have the Microsoft Excel application installed on your computer.
NOTE 2: Your browser settings might be configured to block pop-ups. If this is the case, when you attempt to download the roster a browser message appears alerting you that the browser has blocked what it considers a "pop-up".
In Internet Explorer (IE) the message looks like this:
![]()
- Click the Options for this site button to see the fly-out menu. If you choose Always allow, in future you will not receive the message; the Excel file will automatically download.
- Alternately, you can click the Allow once button if you only want to enable the browser to download the file in this instance.
In Firefox the message looks like this:
![]()
- Click the Options button to see the fly-out menu.
- If you select Allow pop-ups for website, in future you will not receive the message; the Excel file will automatically download.
- Firefox does not provide the allow once option.

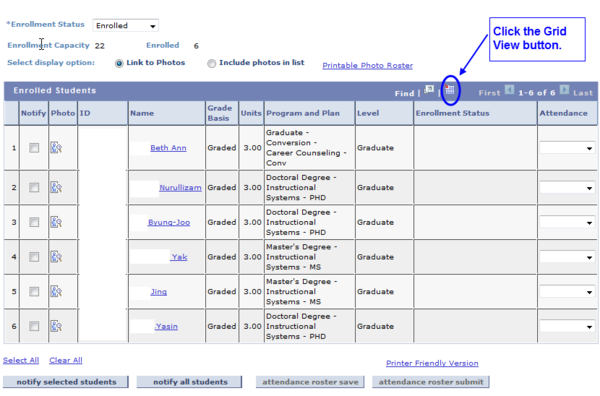
1. Navigating to your Faculty Center as described above takes you to the My Schedule page. Click the Class Roster icon appearing next to the class for which you want to download a roster into Excel. The roster appears.
![]()
2. Click the Grid View button. If you have pop-ups blocked, this is the point in the process where the pop-up blocker message appears. If you get the pop-up message, select allow and click the Grid View button again. A dialog box appears.

3. The dialog box asks if you want to open or save the file. Select Open. You may see a message like this one, alerting you that the .xls file is in a different format than specified by the extension and asking you to verify that the file is not corrupted:

Click Yes.
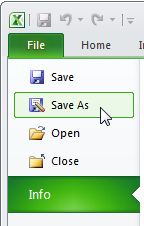
4. The Excel file opens. Go to File>Save As to save the file to the desired location.

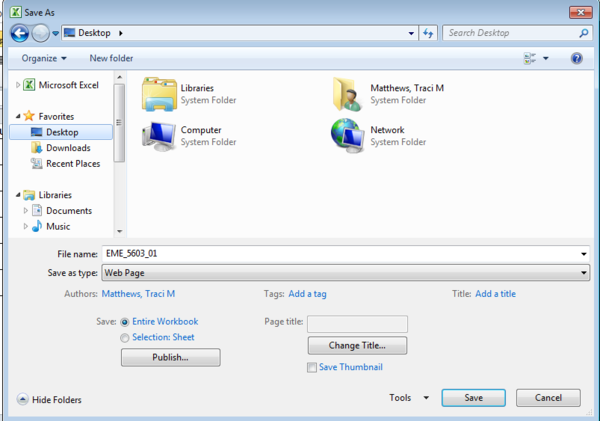
5. Name the file something that makes sense to you. In this example, the file has been renamed for the class: EME_5603_01.

